Fine-Grained Permissions via Keycloak
Nebari uses Keycloak to centrally manage roles,
permissions, and scopes for its core services like jupyterhub and conda-store. By
default, Nebari provides:
- Predefined roles (e.g.,
conda_store_admin,jupyterhub_developer) - Default groups (
admin,developer,analyst,superadmin) - Clients corresponding to key Nebari services
These defaults cover most common access requirements. However, when more specific or granular access control is needed, administrators can create custom roles and scopes in Keycloak, see Creating Custom Roles with Scopes.
Default Clients and Groups in Nebari
A fresh Nebari deployment comes with several custom Keycloak clients (services) enabled. You can manage these from Clients in the Keycloak admin console:
clients:
  - jupyterhub
  - conda_store
  - grafana (if monitoring is enabled)
  - argo-server-sso (if argo is enabled)
  - forwardauth
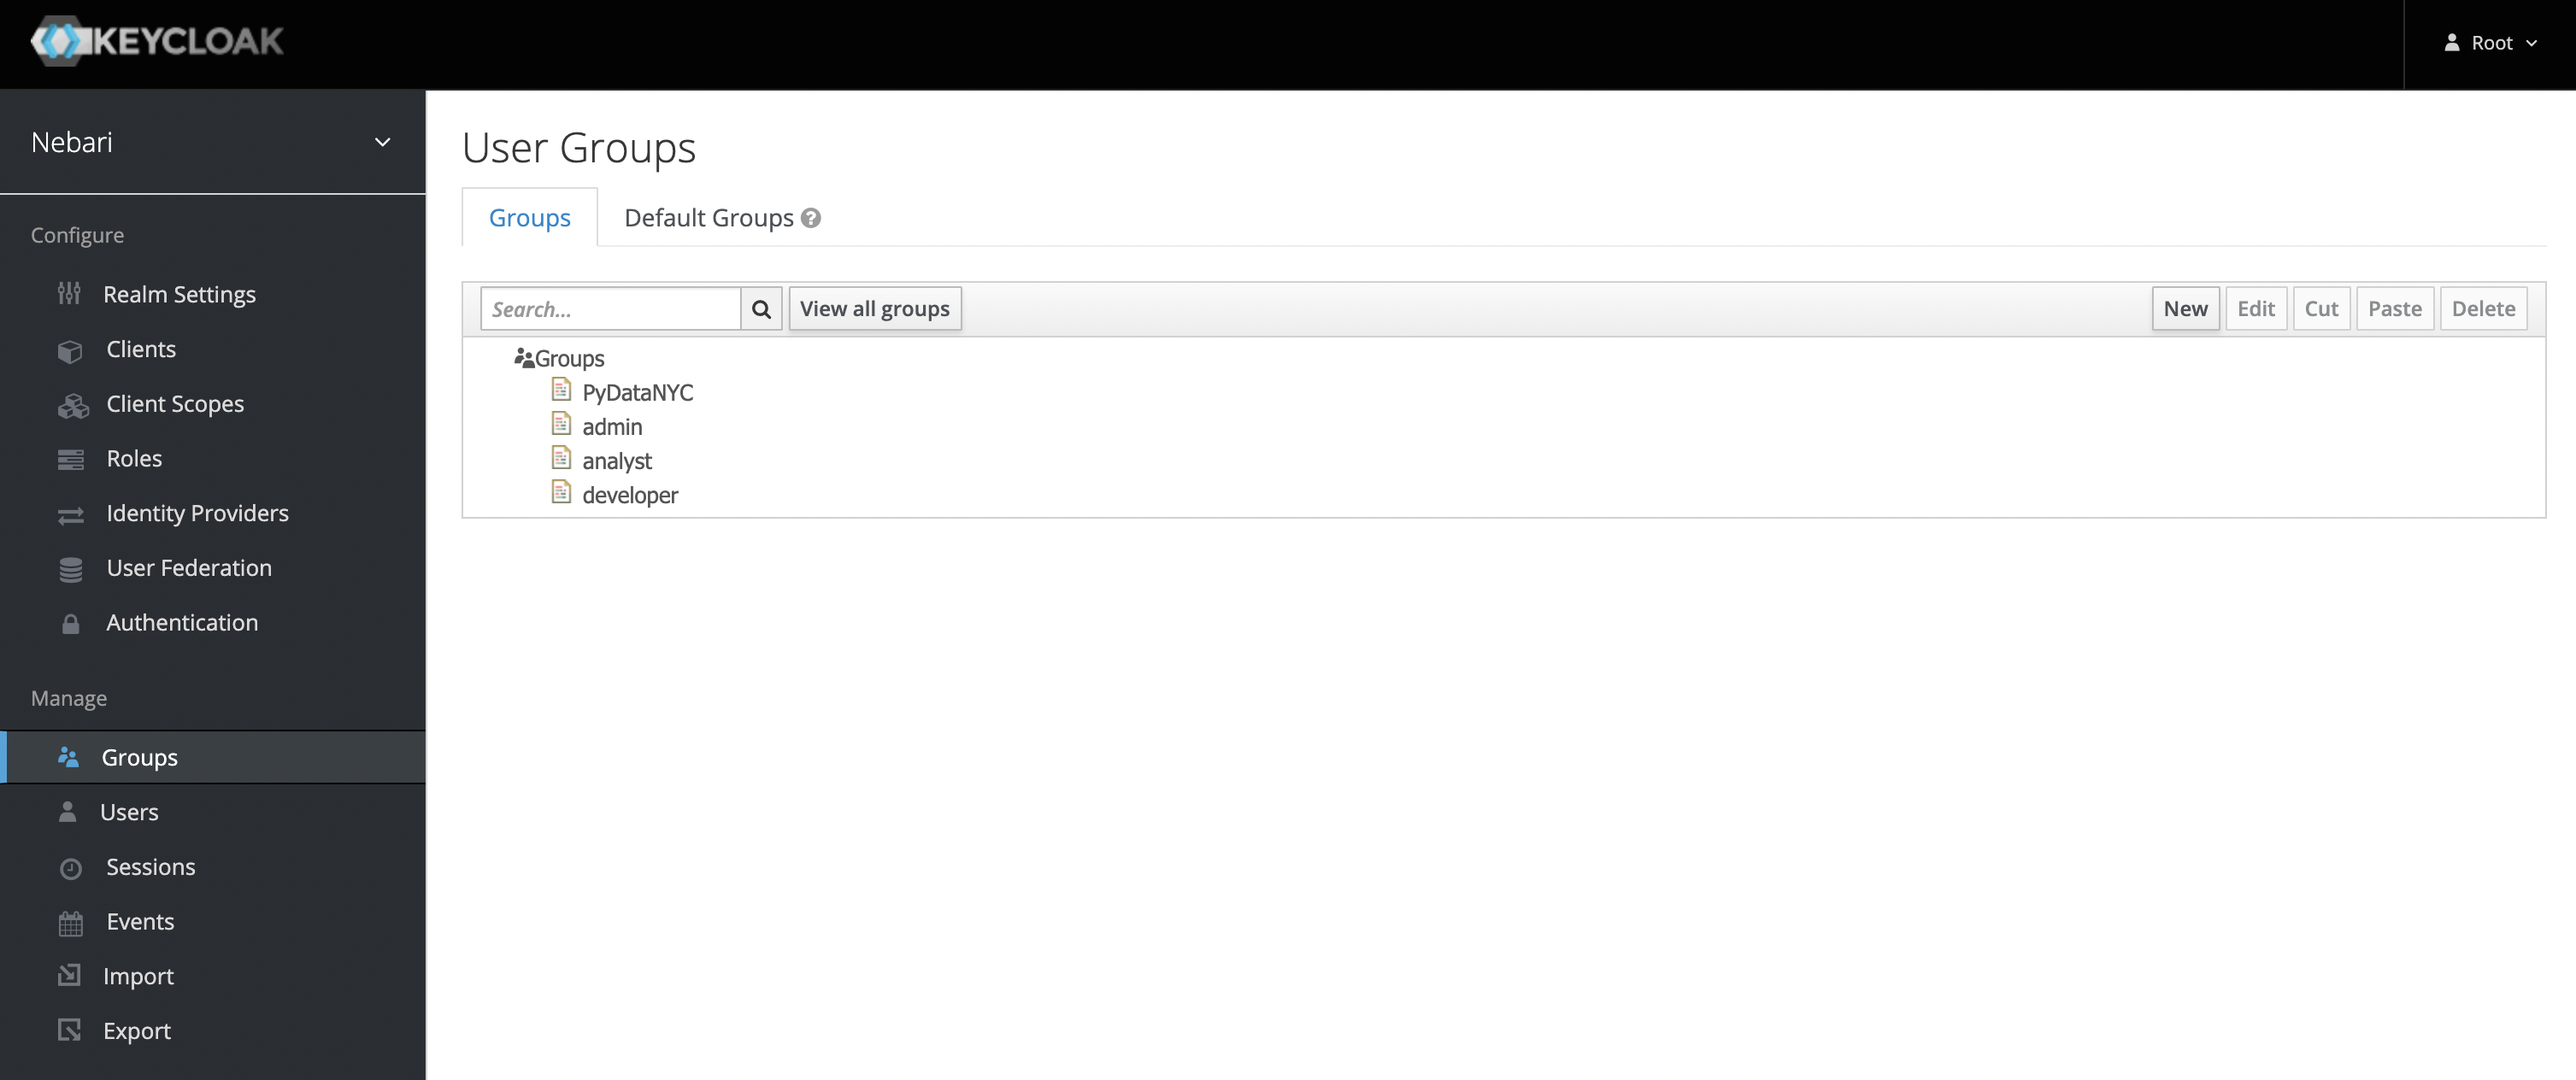
Users are organized into default groups: admin, developer, analyst, and
superadmin. Each group has one or more default roles that define their access level
across Nebari services.
Membership in one of the default groups also grants access to the corresponding shared
folder (e.g., the developer group has access to ~/shared/developer). Since,
2024.9.1 Nebari now required a special role to access the shared folders
Allow-group-directory-creation-role.
In-depth Look at Default Roles and Groups
Groups represent a collection of users that perform similar actions and therefore
require similar permissions. By default, Nebari is deployed with the following groups:
admin, developer, and analyst (in roughly descending order of permissions and
scope).
Roles on the other hand represent the type or category of user. This includes access and
permissions that this category of user will need to perform their regular job duties.
The differences between groups and roles are subtle. Particular roles (one or many),
like conda_store_admin, are associated with a particular group, such as admin and
any user in this group will then assume the role of conda_store_admin.
Roles in nebari can stack, meaning that if a user is in one group with role
conda_store_admin and another group with role conda_store_viewer, this user
ultimately has the role conda_store_admin. Also, in case of different level of access
originating from different groups, precedence is given to the highest level of access.
Below is a table that outlines the default roles, groups, and permissions that come with Nebari:
- Analyst
- Developer
- Admin
- Super Admin
| Resources | Roles | Permissions |
|---|---|---|
|
|
|
| Resources | Roles | Permissions |
|---|---|---|
|
|
|
| Resources | Roles | Permissions |
|---|---|---|
|
|
|
| Resources | Roles | Permissions |
|---|---|---|
|
|
|
See Conda-Store Authorization Model for additional details.
The jupyterhub_admin role grants permission to impersonate other users, including
viewing their home folder contents. Use it sparingly and refer to the JupyterHub
docs
for more info.
Roles, Groups, and Scopes
When managing user access in Nebari, it's helpful to understand how roles, groups, and scopes work together:
- Roles: A named set of permissions, while also providing a way to categorize users
by their access level or job function. Example:
conda_store_developerorjupyterhub_admin. - Groups: Collections of users who need similar permissions. For example, the
developergroup might contain multiple roles likeconda_store_developerandjupyterhub_developer. - Scopes: A Service's fine-grained permission entity within a role. For instance, a
JupyterHub scope might be
read:users:name(to read other users’ names), while a Conda-Store scope might beadmin!namespace=analyst(to grant admin-level access in theanalystnamespace).
Whenever you create or modify a role in Keycloak, it won’t affect anyone until it’s assigned to a group or user. Below is the general process:
Typical Workflow:
- Create or edit a role (and define its scopes) under the relevant Client
(e.g.,
jupyterhub,conda_store) in Keycloak. - Assign this role to a group (or directly to an individual user).
- Add users to that group if you haven’t already.
Users must log out and log back in for newly assigned roles to take effect.
Granting Permissions to a User
Let’s say you have someone who only needs administrator-level privileges for Conda-Store, while leaving other services at their default access.
As an example, we create a new group named conda-store-manager. This group will have
administrator access to the Conda-Store service.
- Click New in the upper-right hand corner under Groups.
- Then, give the new group an appropriate name.

- Under Role Mapping, add the appropriate Client Roles as needed; there should be no need to update the Realm Roles.
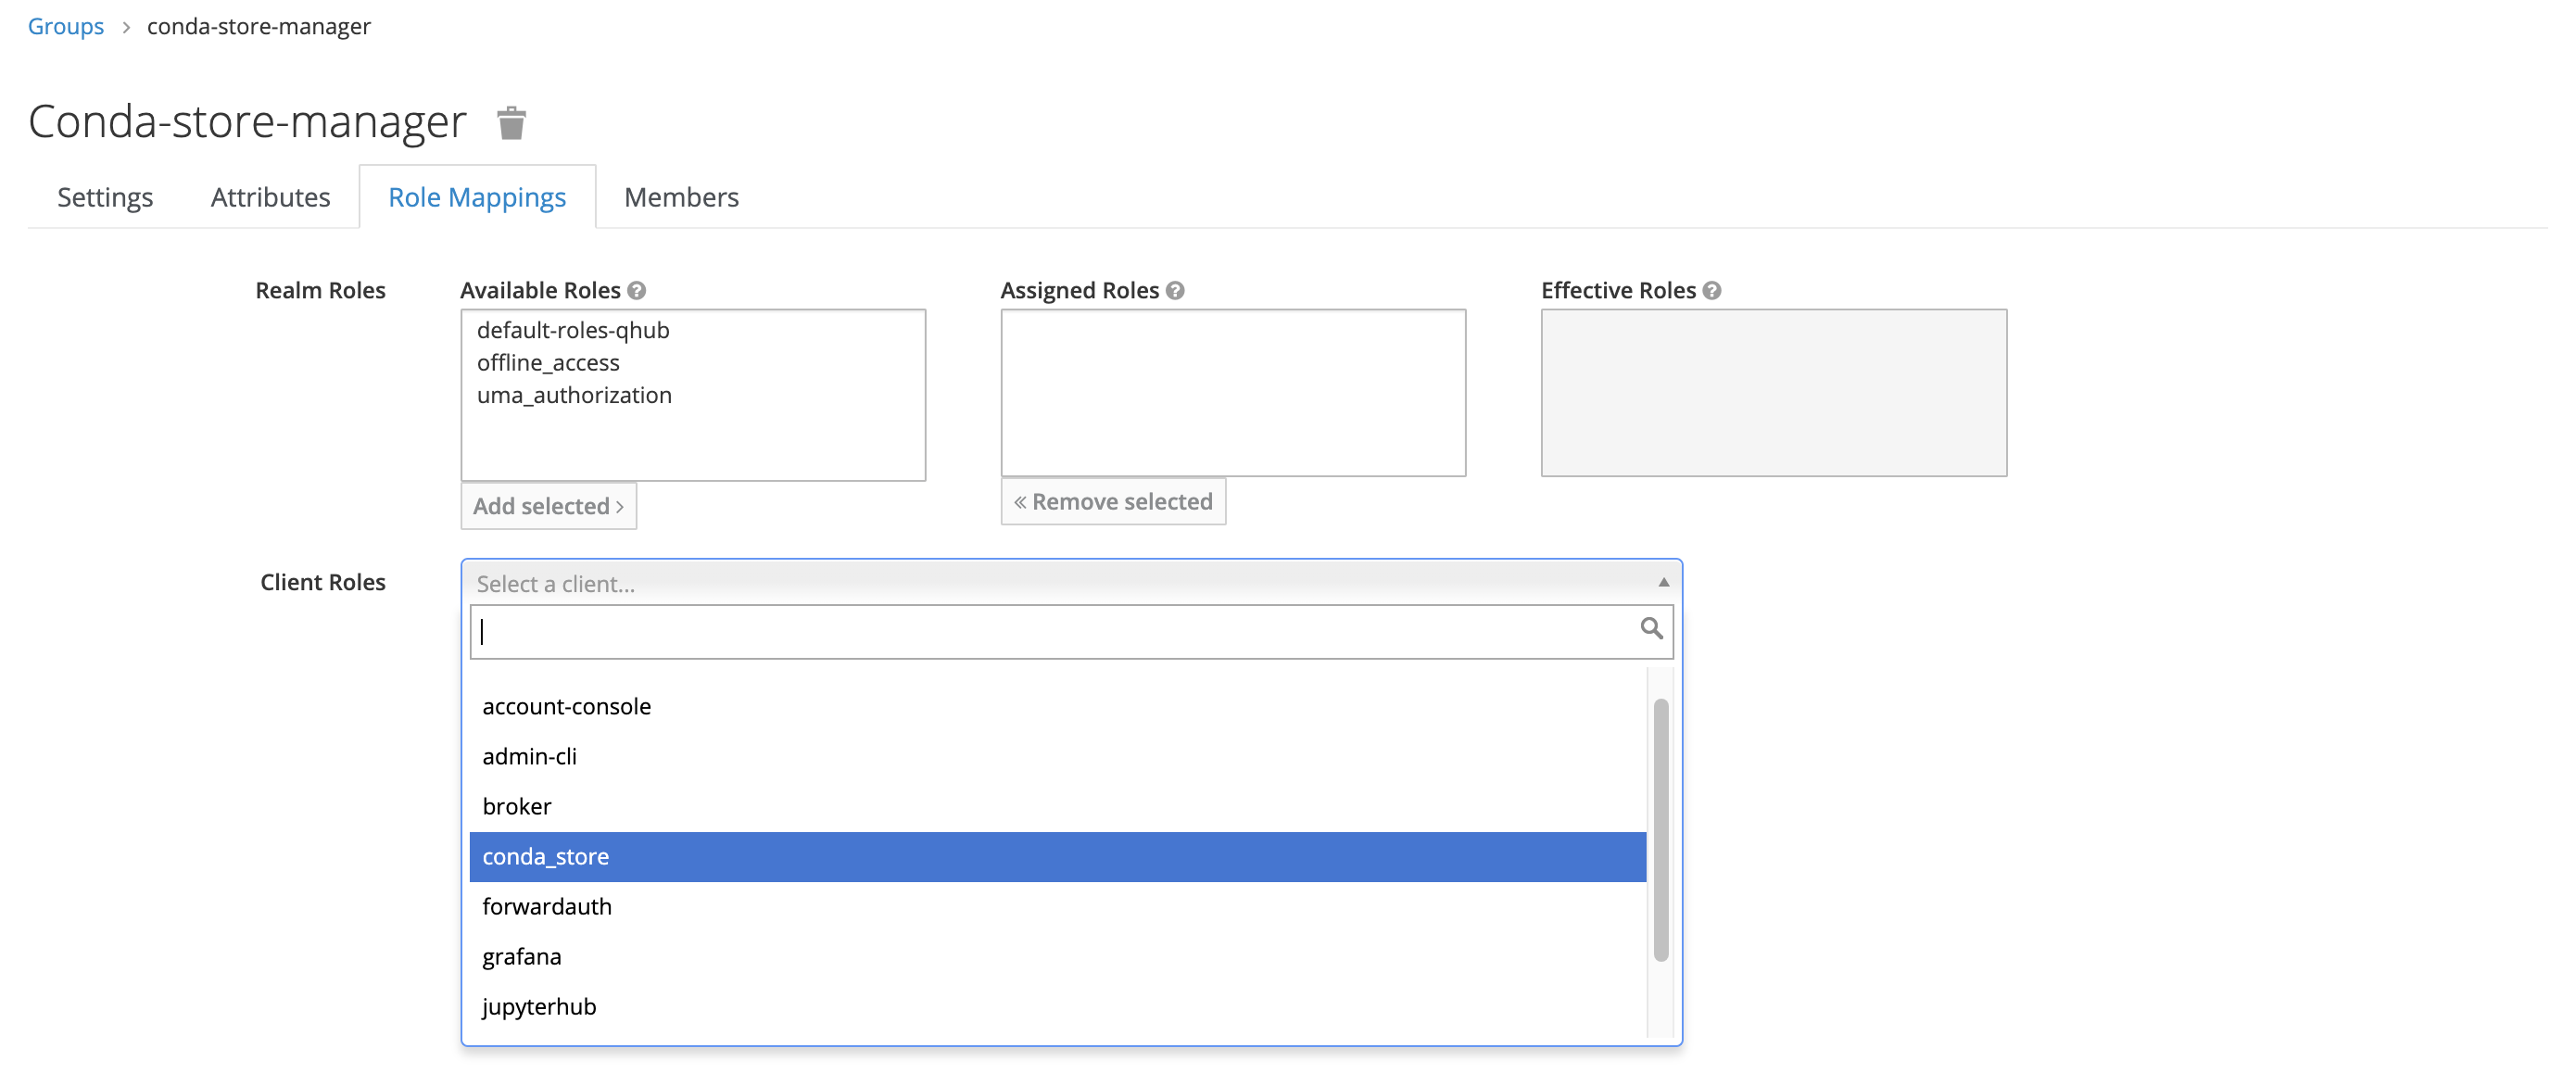
In this example, the new group only has one mapped role, conda_store_admin; however,
it's possible to attach multiple Client Roles to a single group.
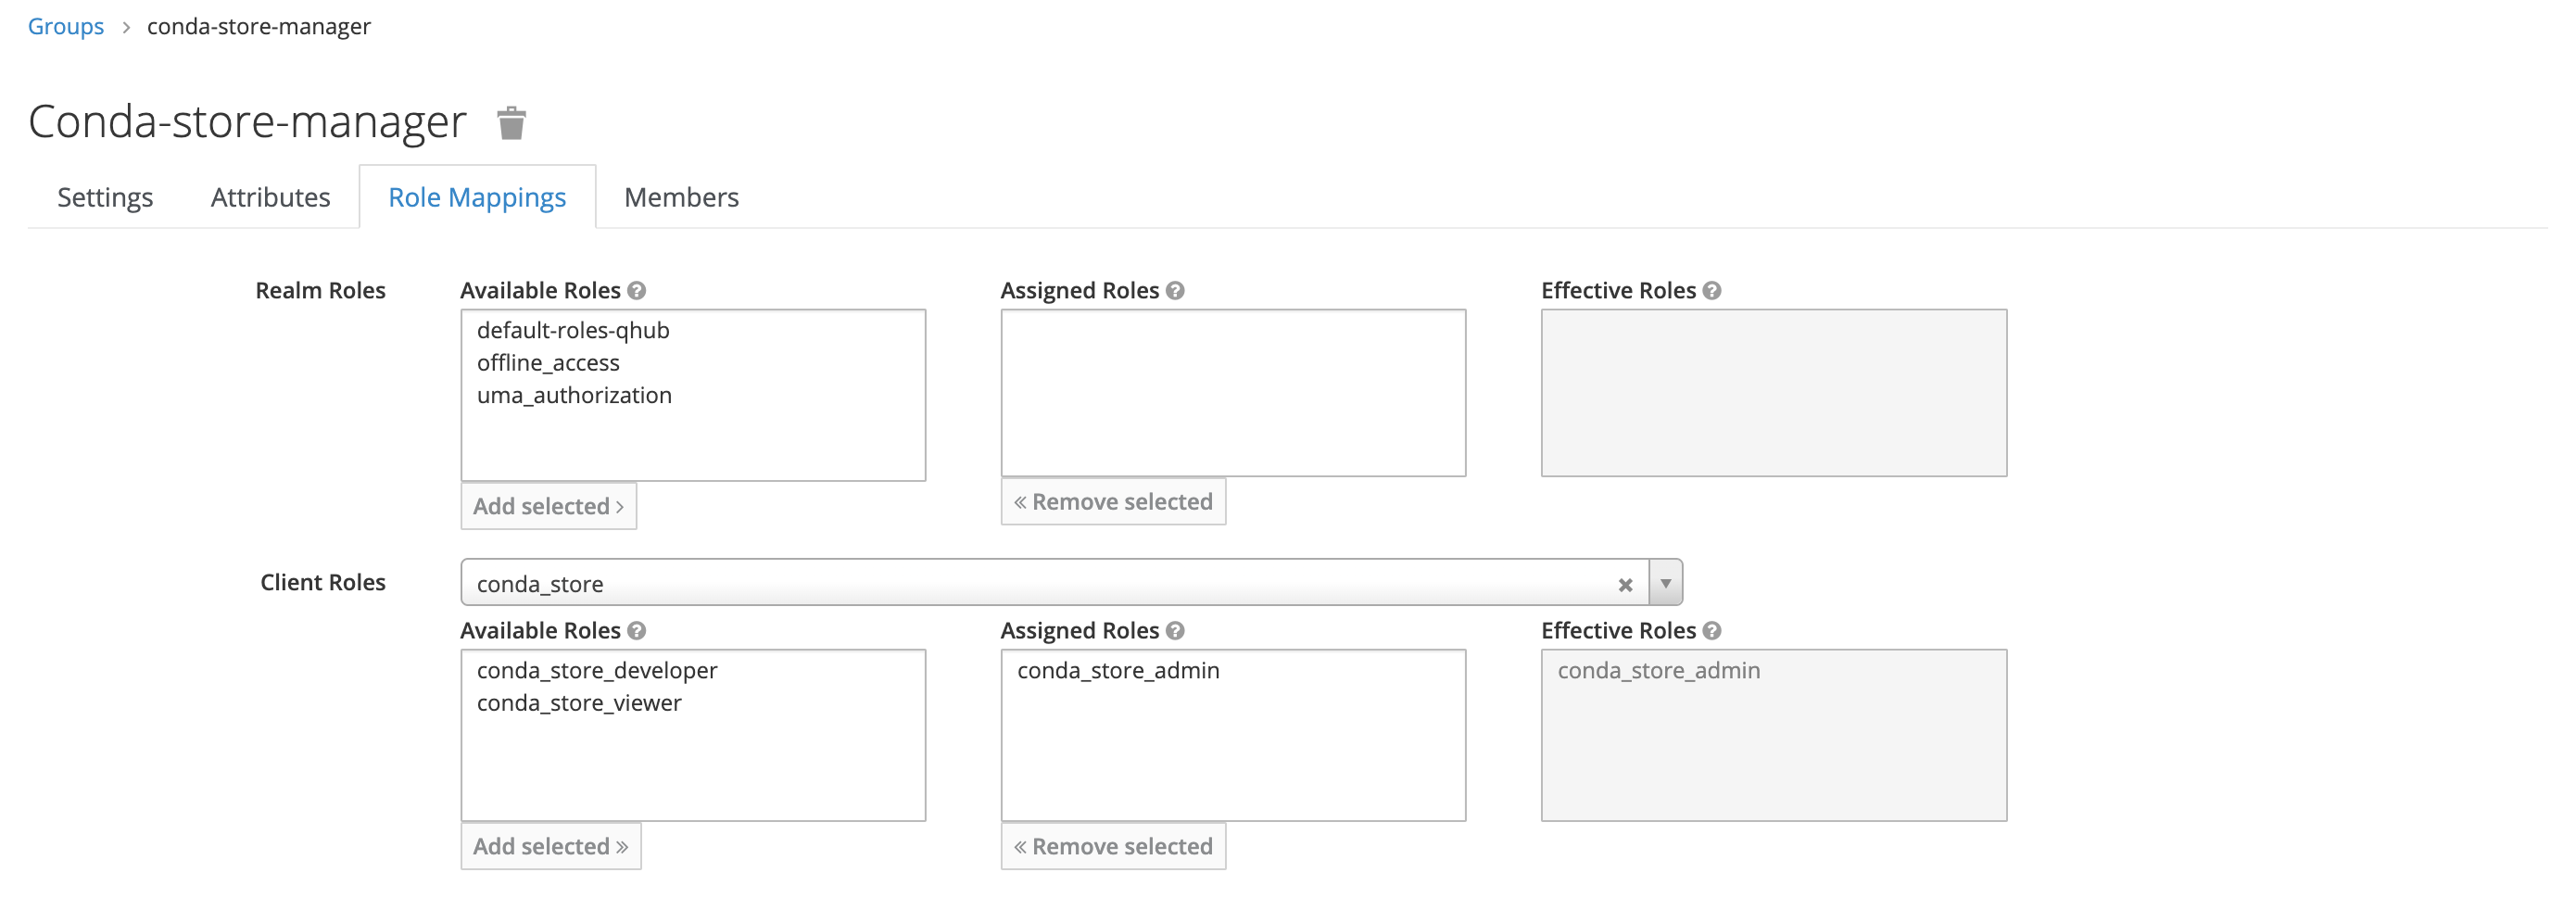
Once complete, return to the Users section in the dashboard and add the relevant users to this newly created group.
To create new groups or modify (or delete) existing groups, log in as root and click
Groups on the left-hand side.
Creating Custom Roles with Scopes
Beyond Nebari’s default roles, you can also create your own with highly specific permissions. The process for creating a role is similar, irrespective of the service.
Nebari currently only supports custom roles for the jupyterhub and conda_store.
Future releases may extend this to other services.
Components and Syntax
In Nebari, scopes are closely tied to the service (client) you’re working with— In Keycloak's roles we identify them as “components.”
- Components:
Specifies the service that a role’s scopes apply to (e.g.,
jupyterhuborconda-store). - Scopes: The actual permission strings recognized by that service.
JupyterHub Scopes
JupyterHub scopes syntax in Nebari follow JupyterHub’s built-in RBAC syntax. For example:
shares!user,read:users:name,read:groups:name
shares!user: Allows sharing servers with other users.read:users:name: Grants read access to other users’ names.read:groups:name: Grants read access to other groups’ names.
This combination allows a user to share their server with others (via shares!user) and
also read other users’ and groups’ names.
For a complete list of JupyterHub scopes, see the [https://jupyterhub.readthedocs.io/en/stable/rbac/scopes.html#available-scopes](JupyterHub documentation).
Nebari extend these scoped including a new share scope that is reserved for
Jhub-apps usage, allowing, as seen above for sharing servers with other users,
including more specifcaly jhub-apps applications (apps).
Conda-Store Scopes
Conda-Store scopes are defined at the namespace level. For example:
admin!namespace=analyst,developer!namespace=nebari-git
admin!namespace=analyst: Grants an admin role in theanalystnamespace.developer!namespace=nebari-git: Grants a developer role in thenebari-gitnamespace.
This grants an admin role in the analyst namespace, plus a developer role in
the nebari-git namespace. When assigned to a user or group, these permissions apply
only to those specified namespaces in Conda-Store.
Conda-store scopes follow a much simpler syntax than JupyterHub scopes, as they are only defined at the namespace level:
<access_level>!namespace=<namespace_name>
whereas the access_level there entices the available conda-store' roles as per its own
documentation
Conda-Store
role-mappings.
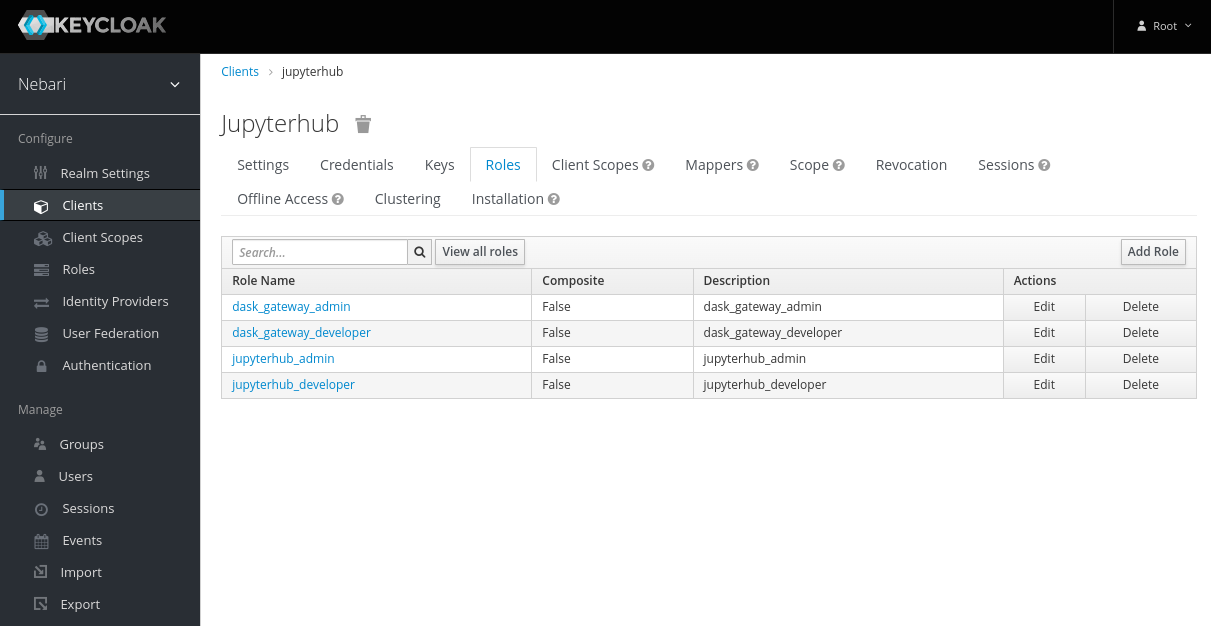
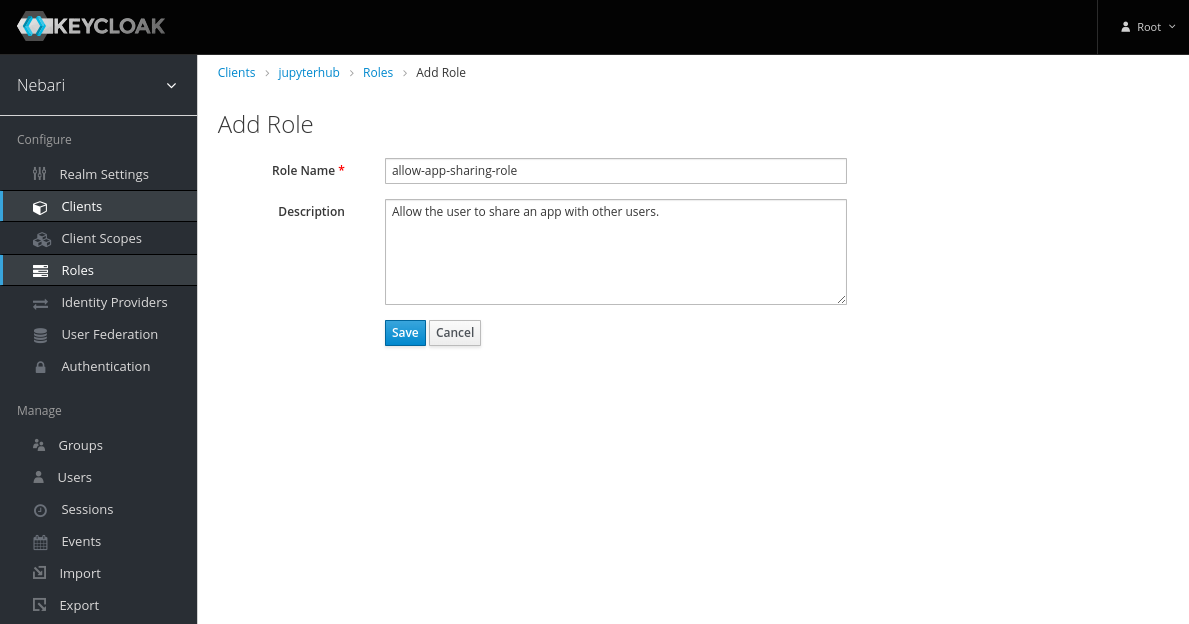
Creating a Role
In the following example, we create a new role for the JupyterHub client granting the
same level of permission outlined in the section above JupyterHub Scopes.
-
Select the appropriate client and click on "Add Role".
-
On the "Add Role" form, write a meaningful name and description for the role. Be sure to include what this role intends to accomplish. Click "Save".
-
Now the role has been created, but it does nothing. Let's add some permissions to it by clicking on the "Attributes" tab and adding scopes. The following sections will explain the
componentsandscopesin more detail.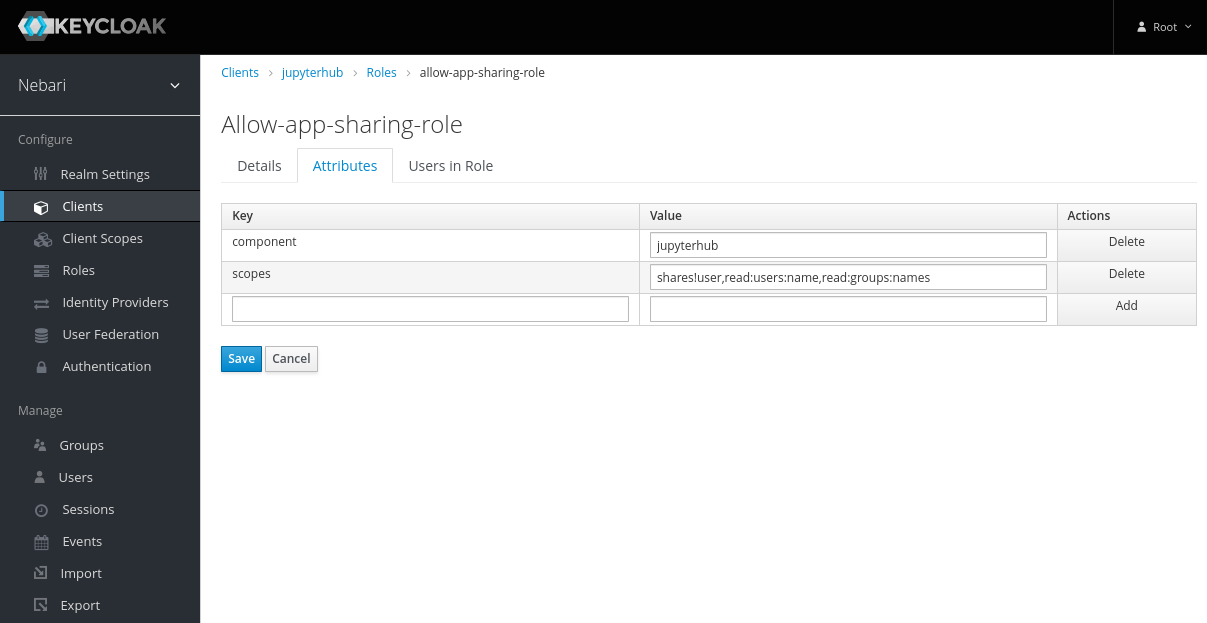
To make these new permissions effective, assign the custom role to a user or group (via Role Mappings). Again, any user changes require a re-login to become active.